|
archives
|
|
2006 - first half
2005 - second half
2005 - first half
2004 - second half
2004 - first half |
| 2006 - second half |
|
|
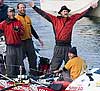
24 November 2006
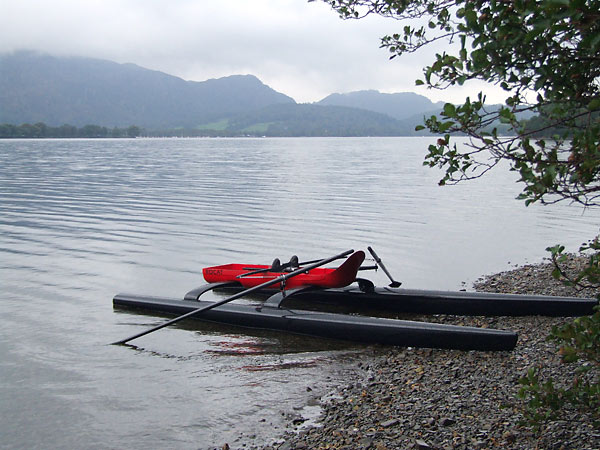
It's musical boats at ROCAT! Matias Wolf, boat #3, is moving from Switzerland to Brazil, and has asked us to defer delivery of his boat until he has had a chance to settle in over there around next March. So we have decided to use the boat we made for him as the Adam Woolfitt sponsored ROCAT demonstrator, and make a new one for Matias later. This means that anyone in the west of England is now very welcome to come and try the boat and, as soon as we can manage it, we will take it up country for other interested parties to try – if you are one such, please let us know. Meanwhile, it will be great to be able to get back out on the water, especially as we get some good seas at this time of year in Cornwall!
Wiz Deas, from Matrix Composites Materials Company came down at the beginning of the week with Jimmy Renault, the technical guy from Sicomin (who make the epoxy resin we use). This is the kind of customer care I really appreciate, and we had a really instructive discussion. One extremely valuable bit of information to come out of the meeting relates to post-curing the resin – this is necessary to toughen the resin and raise the temperature it will stand, and I had been told by the experts that the post-cure cycle involved ramping the temperature of the part up by 10°C an hour to within 10°C of the desired top temperature, then cooling it at the same rate. As we worked out that a dark boat in the tropics could reach 90°C, we have been postcuring to 80°C, which is very hot. Jimmy assures us that there is no need to go so high – we should raise and lower the temperature more gently, and hold 60°C for at least 4 hours. That's much more like it.
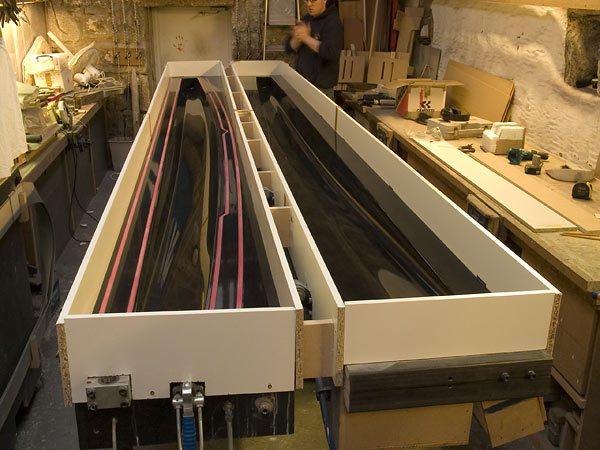
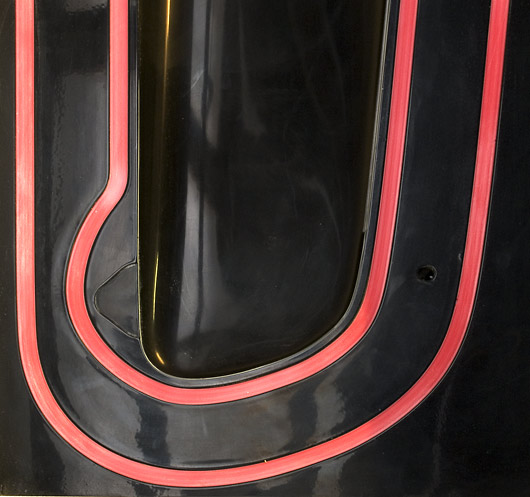
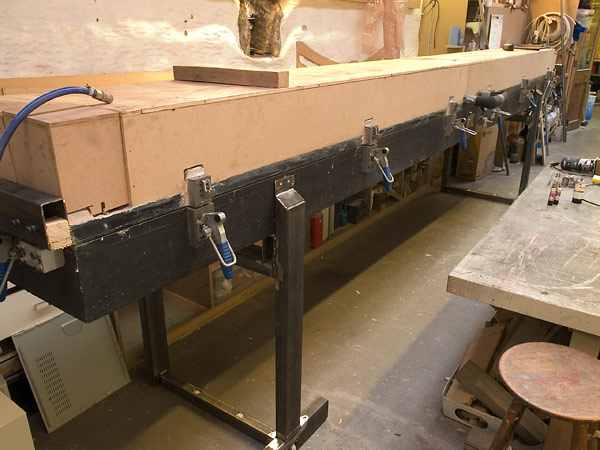
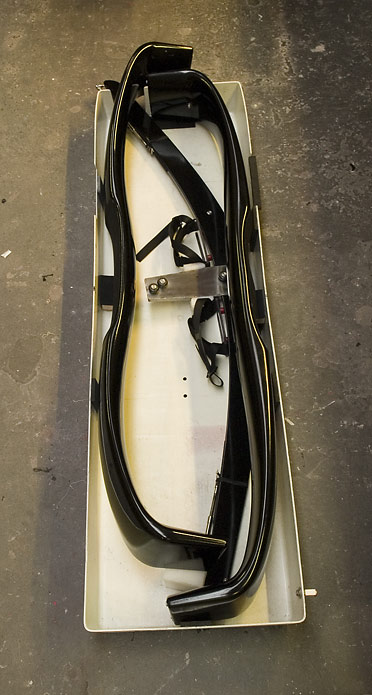
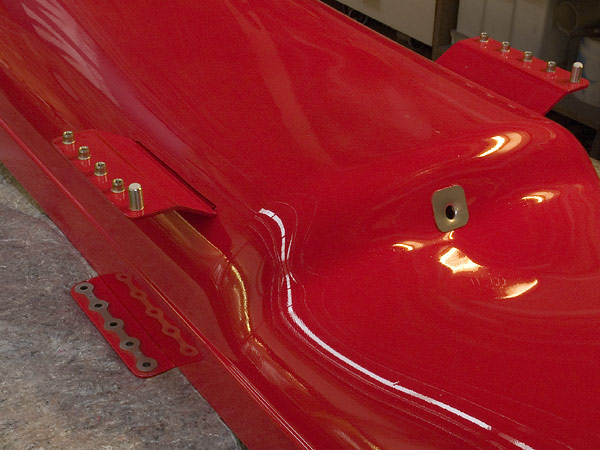
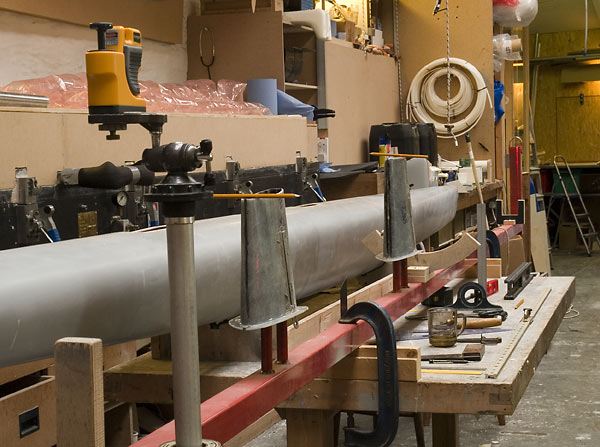
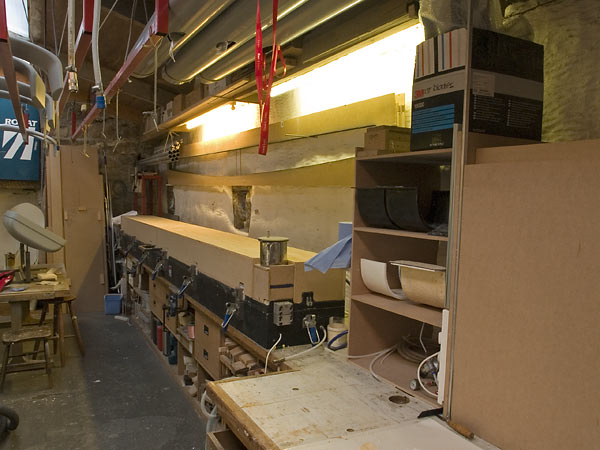
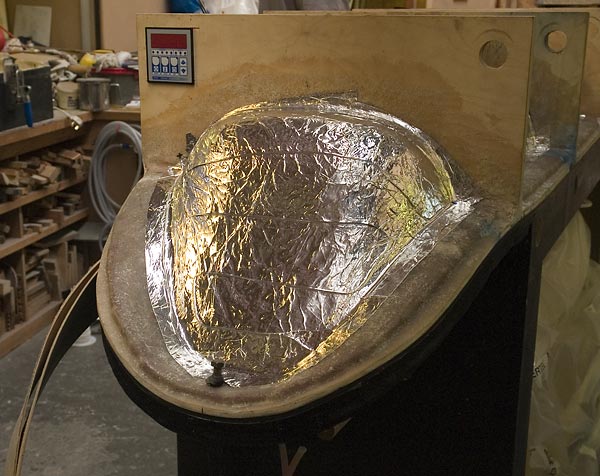
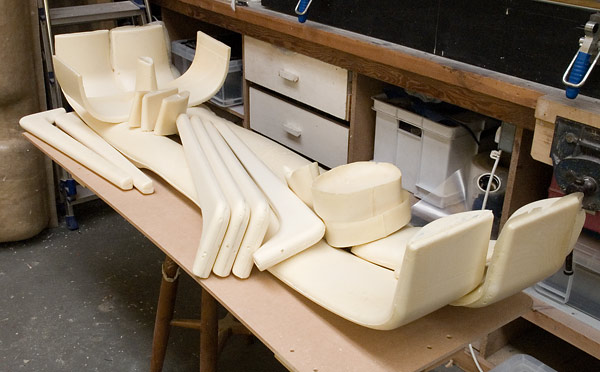
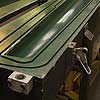
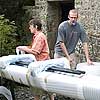
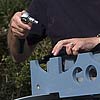
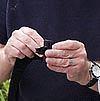
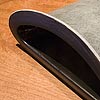
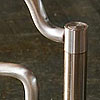
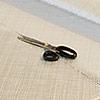
We are busy making plugs off the refurbished hull moulds – these will then be carefully packed and stored away as the reference shapes from which all future hull moulds will be taken ... CL
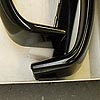
... 1) preparing to take plugs off the refurbished hull mould 2) close-up of the bow showing the vacuum port; we have filled the seal grooves to reduce the risk of problems demoulding.
|
|
|
|
14 November 2006
"How fast will it go?" This was a common question when I showed the first prototype at the 2003 London Boat Show. The boat had come second in the British Marine Federation 'Concept Boat 2002' competition (which attracted 90 entries from 30 countries), and part of the prize was space on the Concept Boat Stand. This would be the ROCAT's first public appearance, and it was a wonderful opportunity to get the feedback I needed to help me decide whether to put this new-fangled rowing device into production.
I was unable to answer that question, though – I had neither access to tank testing facilities, nor the skills or software to do the necessary calculations. I had designed the hulls using intuition and some hull design software. In hoping that the ROCAT would compare favourably with a conventional open water scull, I made three main assumptions; 1) that the two very slim hulls would be easily driven; 2) that the new ROCAT rig would be more efficient at converting the rower's energy into motion, and 3) that the boat would go better because the rower is in a fixed seat, so it would not be subject to the dramatic momentum and centre of gravity changes of a conventional sliding seat sculling boat.
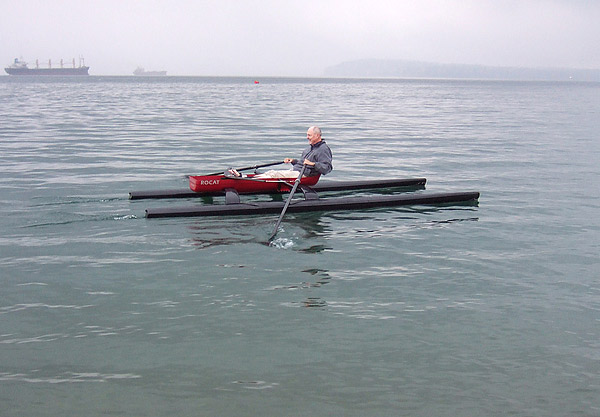
All the time I rowed the early prototypes, I had no means of measuring speed, so trial and error improvements derived from 'the seat of my pants'. Then, when I got a gps to use on proto 4, I still didn't know how the speeds I was achieving compared with other boats. I am therefore well pleased to get reports from Richard in Vancouver for, as part of getting to know Centurion II, he has been rowing against other club members in various different open water craft.
He is enjoying his ROCAT's absolute stability, and its comfort, and its beauty, and the new stroke, but he is finding that it is not as fast as he (and I) had hoped. Although he cautioned me, way back, not to expect too much on the speed front, he was still hoping to be able to leave the Echos and Aldens of this world behind – this have proved not to be possible, at least, not on flat water.
Discussions with the knowledgable guys on the 'human powered vehicles - boats' list centred on a catamaran's wetted surface area, which is greater than that of a monohull of similar displacement, and this causes extra drag. What we don't know is whether or not the extra efficiency of the ROCAT rig is sufficient to compensate for the extra drag. Sliding seat rowers have had some 120 years to perfect their stroke – the ROCAT stroke is new, and we must learn from scratch how to get the best out of it.
Also, none of the aforementioned open water boats could possibly go out in the rough conditions in which the ROCAT revels – call it the mountain bike of rowing; nobody would expect a mountain bike to beat a road bike on the flat.
Apart from its rough weather performance, the ROCAT is very good at ambling along at 5½ to 6½ mph – this is a pace I can comfortably keep up for hours on end, and Richard agrees. But someone stronger, with time to get the hang of the stroke, should be able to maintain a significantly higher speed.
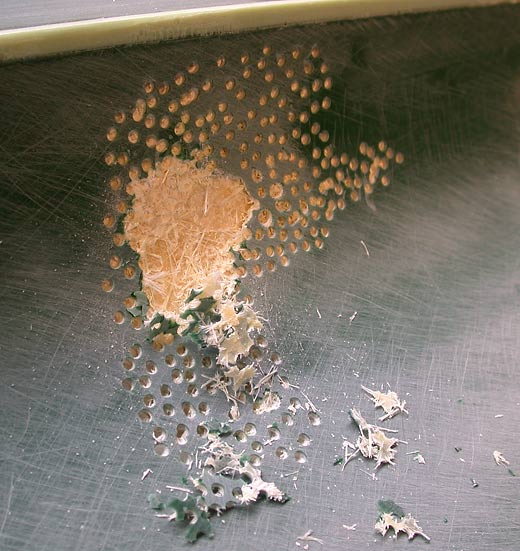
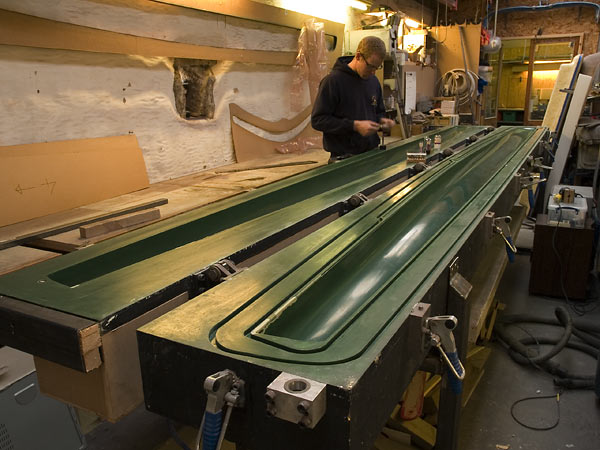
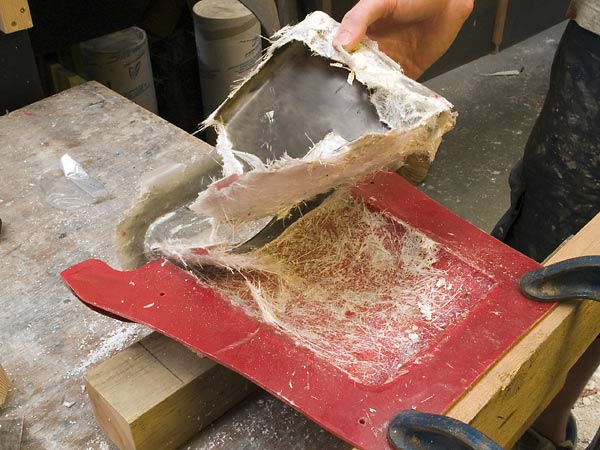
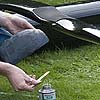
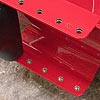
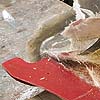
Meanwhile, we have unfortunately had more problems with the hull mould. Numerous bumps on the surface of the lid turned out to be patches of delamination, which had to be excavated and filled. However, we have now refinished it, and I will post some picture tomorrow – it doesn't look too bad ... CL
... 1 one of the bubbles being excavated
|

|
|
|
7 November 2006
Having finished the first batch of three ROCATs, Anthony and I took a short break!
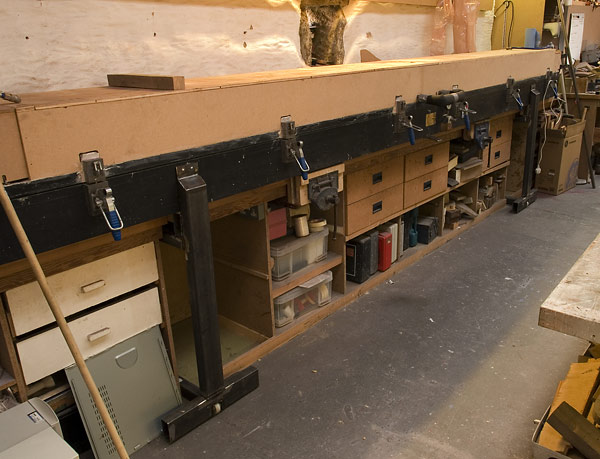
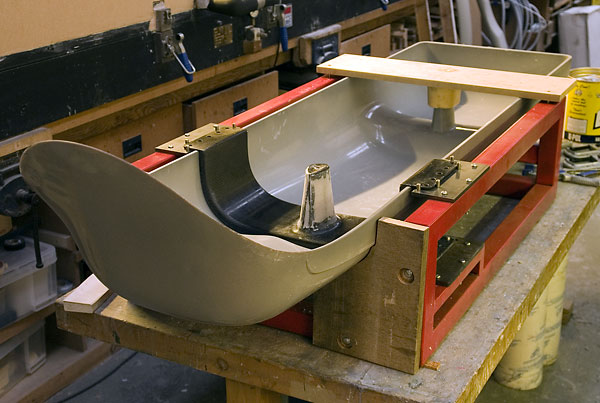
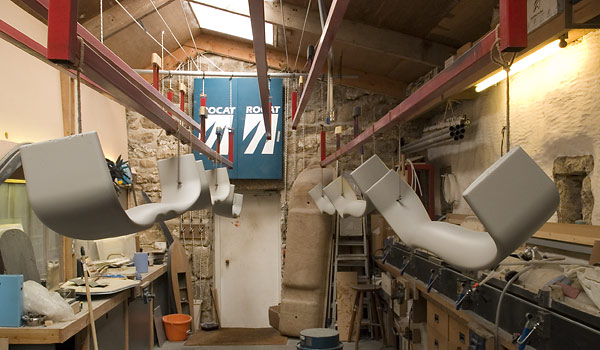
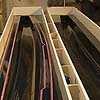
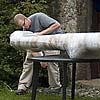
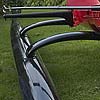
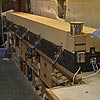
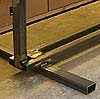
Just before we left, we made the dramatic decision to mount the (very heavy) hull mould on wheels, and Anthony knocked up a couple of hefty frames for the purpose – the pictures show what for. With both halves of the mould lying flat, it will be a great deal easier first to spray the epoxy primer into the mould, then to lay up the glass etc. for each hull. However, our first task is, unfortunately, to refurbish the mould – which is a lot sooner than we had anticipated. The main reason for this is that the mould surface became distorted when we heated it up to post-cure the hulls, especially where the maker attached reinforcing ribs to the back of the mould face. As soon as we get it 'just so', we will take a plug off it which will become the reference master for all future hull moulds – then we will get cracking on the next batch.
ROCAT number 4 will be going to Harmony, New Jersey; 5 and 9 are swapping places and 9 will become our new demonstrator, kindly provided by Adam Woolfitt; and number 6 will be going to Aberdeen, in Scotland – we love the way that, thanks to the internet, ROCAT has become truly international from the word go. And, talking of the internet, this website got 93,178 hits in October! ... CL
... 1, 2 & 3) moving the hull mould out on its new wheeled frames so that the lid can lay flat for much easier access – all we need now is a bigger workshop!
|
|
|
|
22 October 2006
"Christopher, thank you, thank you for designing and building such a wonderful boat!
It's fantastic! It FAR exceeds my highest expectations."
Richard Copley, owner of ROCAT number two.
"good to see number 2 on the water, I would concur with Richard.
It really is fantastic and each time that I have been out its put a smile on my face."
David Gardner, owner of ROCAT number one.
|
|
|
21 October 2006
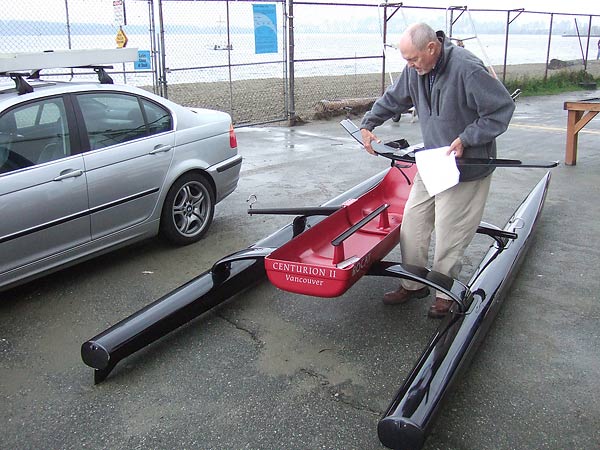
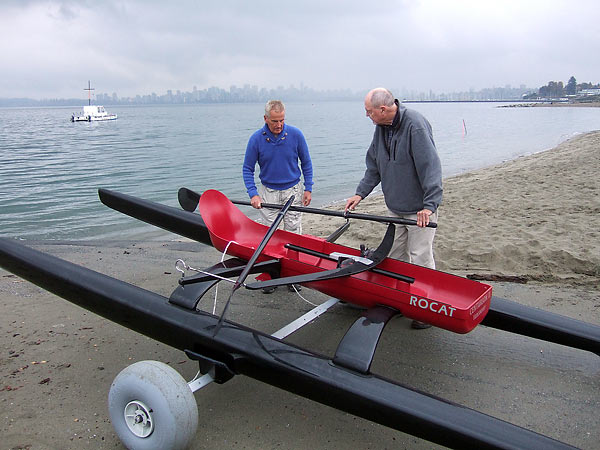
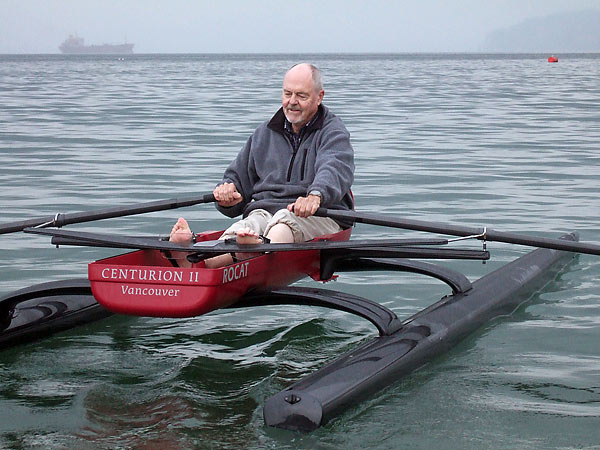
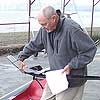
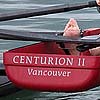
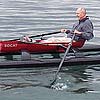
ROCAT number two – Centurion II – has arrived in Vancouver, and had its maiden voyage within minutes of its unpacking.
Very unfortunately, the unpacking revealed damage in transit, and I will report on that further when the matter is resolved.
Richard Copley is one of ROCAT's staunchest supporters. He is a keen open-water rower who, until his ROCAT arrived, rowed his Hudson T-6 on an almost daily basis in English Bay, Vancouver. Richard got wind of the ROCAT project some time ago, and there followed a rapid third-degree email interrogation on every aspect of the boat. Then, one day, apparently satisfied, he announced that he would buy one as soon as it was possible to do so. It turns out that he is a bit of a serial 'early adopter' as he also bought the first Hobie 14 in Canada – judging by the subsequent success of the Hobie cats, perhaps this is a good omen for ROCAT?!
Anthony and I salute and thank our early adopters – while I am driven by a vision the ultimate worldwide proliferation of the ROCAT, they are taking a considerable leap of faith in purchasing something so early in its life cycle. A small operation like ROCAT, with its limited resources, cannot possibly hope to eliminate every niggling problem on a product that has so many novel features. When our early adopters get their boats, they inevitably become part of the development team, and we look forward to their valuable feedback. They will help us make a good product great, and we will repay their faith, as best we can, by sorting any problems they do encounter with all possible speed.
A number of regular visitors to this website are biding their time, waiting to see how things shape up, or waiting for an opportunity to try the boat – this is entirely understandable. We are building a demonstrator in the next batch, and will make demonstration excursions with it next spring – we already have the names of a number of people who are waiting to try it, but if you are in the UK, and would like to be added to the list, please let us know. Meanwhile, I know Richard has plans to show Centurion II to people in the Pacific Northwest when his is more familiar with his boat – I will post details when I have them ... CL
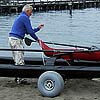
... 1) ROCAT #2 arriving at its new home on English Bay, Vancouver. Jericho Sailing Centre comprises a number of sailing, rowing and kayaking clubs, of which Richard's Locarno Sailing Club is one; 2) instructions in hand, Richard assembles his ROCAT for the first time; 3&4) it is wheeled down to the water's edge, with the Vancouver city skyline in the background; 5&6) the ROCAT's maiden outing in foreign waters! ... the photos were taken by Tobin Copley
|
|
|
15 October 2006
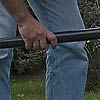
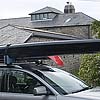
It was an interesting 3D puzzle to fit the footbar and two crossbeams into the seatdeck tray, but they do fit with plenty of room to spare for the lifejacket, extra clothes and lunch.
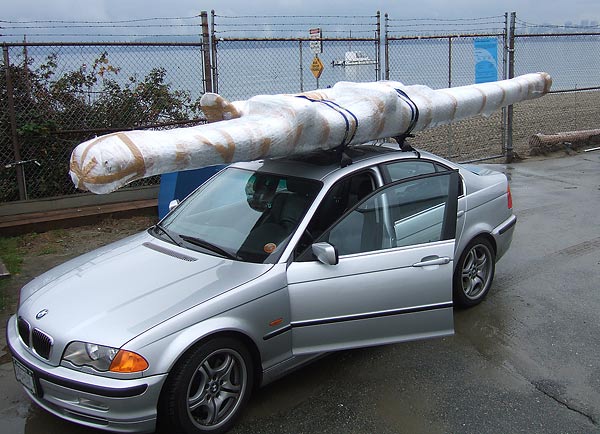
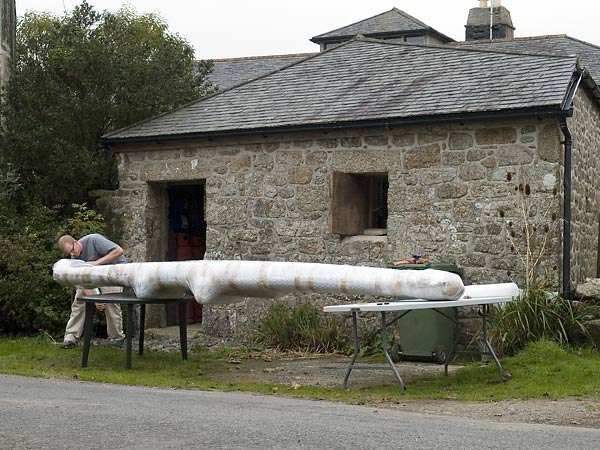
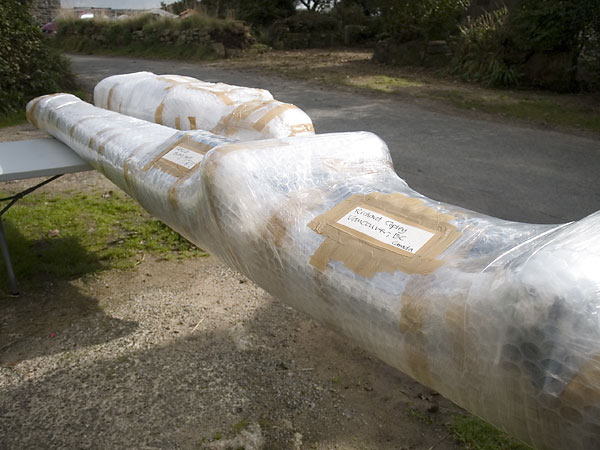
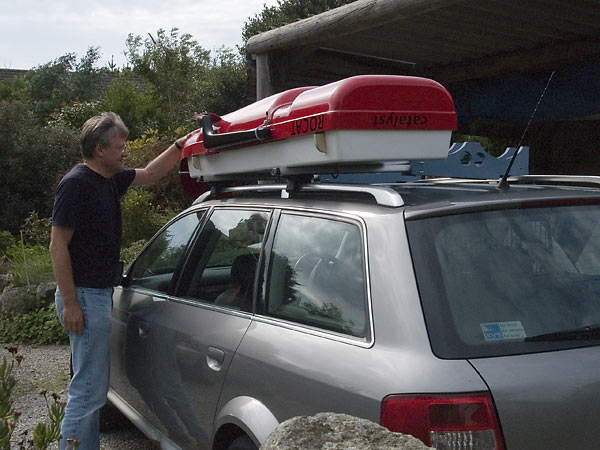
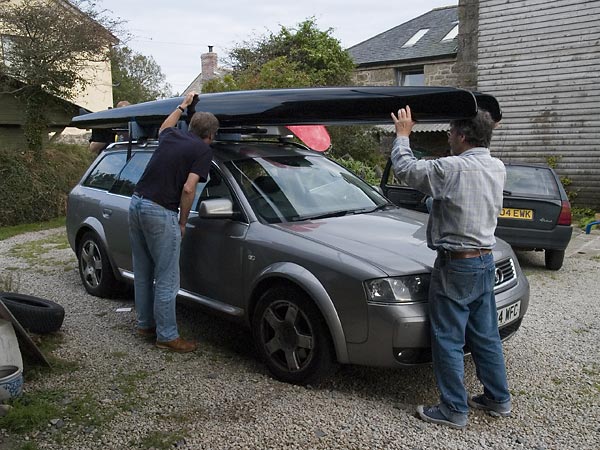
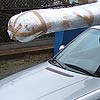
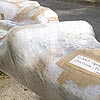
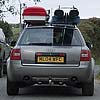
Because the boat is so light, the shippers recommended we wrap the components in bubble wrap, and use shrink wrap to hold it all together – so we make up two packages just as they would be mounted on the car. No.1 contains the two hulls and oars attached to the roof-mounting cradles; and no.2 contains the seatdeck tray, the footbar and crossbeams, with the seatdeck upside down on top of the tray to form a lid.
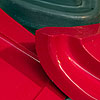
I was planning to photograph Centurion II, ROCAT number two, assembled in the garden, but there was a thick mist when we got up, so we just got on with the packing. Incidentally, it was a complete coincidence that David and Richard's boats are similar, both having black hulls and red seatdecks – boat number three, though, has metallic olive green hulls and a bright yellow seatdeck, which also looks good. At the moment, we are offering any colour you like (metallic or plain) but, in due course we will have to charge more for metallic because it costs more in time and materials.
Centurion II will arrive in Vancouver today, and Richard will pick it up as soon as it clears customs – I look forward to seeing pictures of it in its new home! ... CL
... 1) footbar and crossbeams in the car roof tray; 2 & 3) Alison and Anthony wrap the hulls; outside the workshop as we weren't sure if the finished package would get through the small door you see at the end of the workshop; 3) Centurion II, wrapped and ready to go to Vancouver
|
|
|
|
7 October 2006
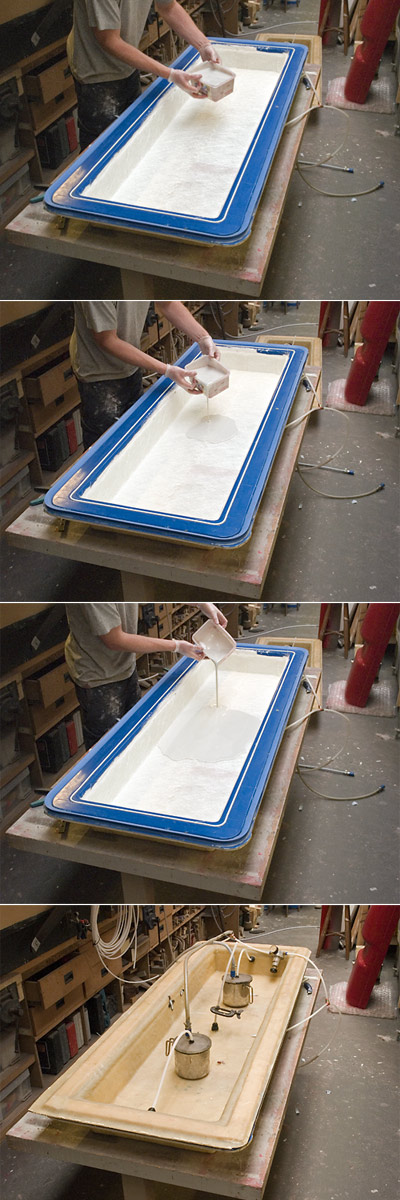
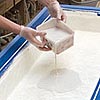
The tray that attaches to the car roof to hold the footbar, crossbeams and seatdeck is made using polyester resin – the only component that isn't made with epoxy. Polyester behaves differently from epoxy and, even with the slow catalyst, it 'goes off' with unnerving speed. As we were having problems infusing the whole tray before this happened, we decided to try combining our normal 'vacuum resin infusion' process with the 'displacement resin infusion' we are using for the sockets (as described 31 July 2006). Anthony just dumped all the resin in the middle of the mould – we then applied the lid and a vacuum, and the whole part infused beautifully in 12 minutes with plenty of time to spare – sorted!
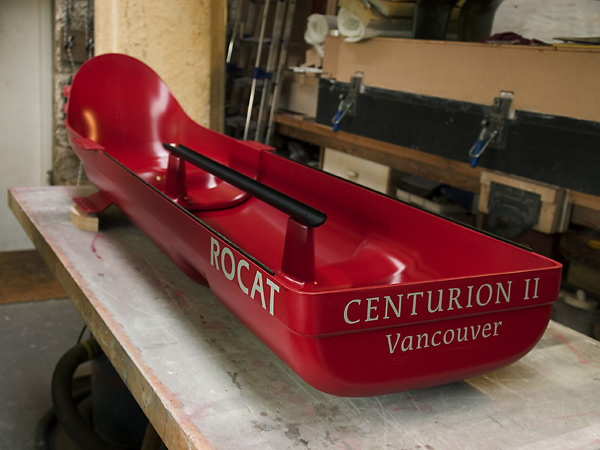
We are down to finishing touches on boats two & three and number two – Centurion II – will ship to Vancouver, British Columbia this week ... CL
... 1) sequence showing moulding of roof tray; 2) ROCAT number two's seatdeck with decals in place
|

|
|
|
29 September 2006
ROCAT number one – catalyst – had its maiden voyage today. David took it out in the rain on Coniston Water (in the Cumbrian Lake District) and, apparently, enjoyed the experience! Twas on Coniston water, BTW, that Sir Malcolm Campbell, and his son Donald, broke a succession of world water speed records; Donald then lost his life in 1967 when his boat, Bluebird K7, somersaulted and crashed at over 300mph.
It's a very strange looking at David's pictures – for the first time I am seeing a ROCAT that is outside my control! I do hope it behaves itself ...
ROCATs number 2 & 3 will be shipped shortly to Vancouver (BC) and Lengnau (Switzerland) ... CL
... 1) 'catalyst' on the shore of Coniston Water
|

|
|
|
24 September 2006
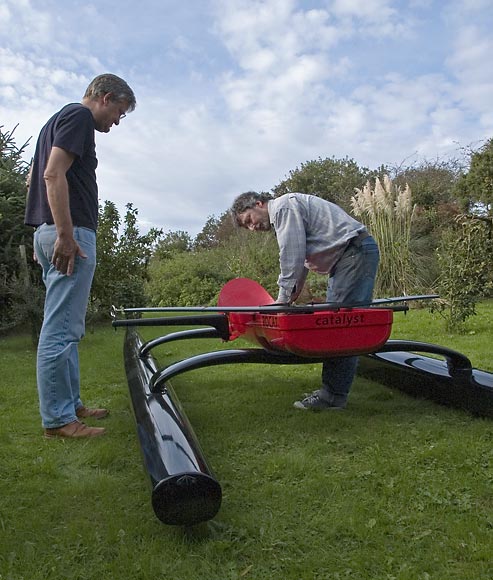
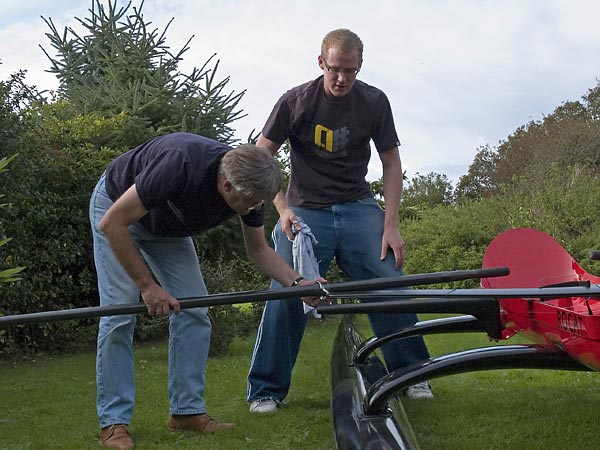
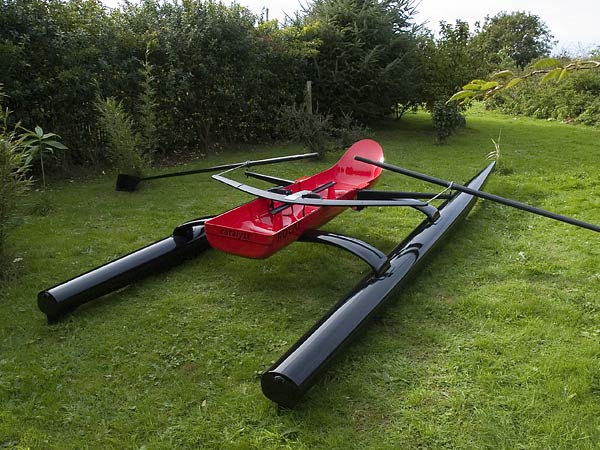
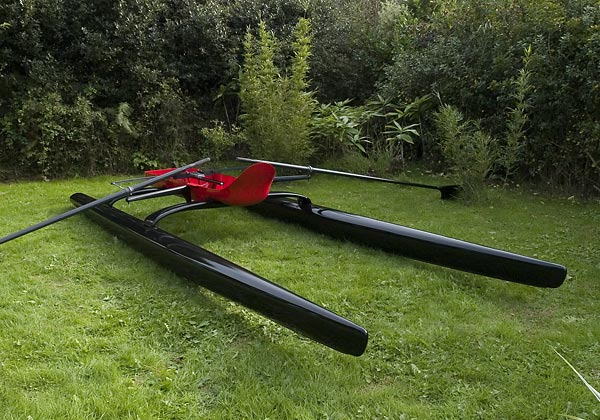
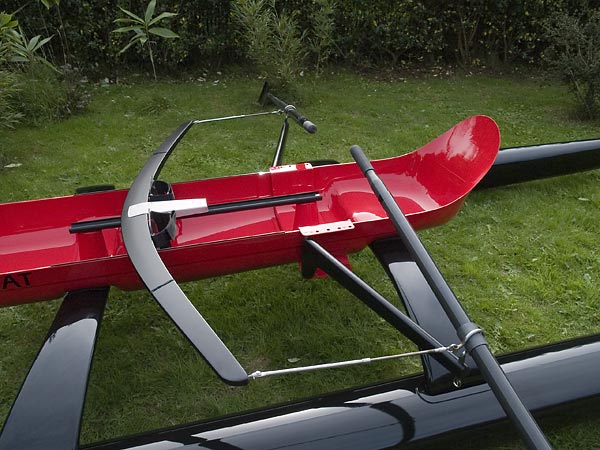
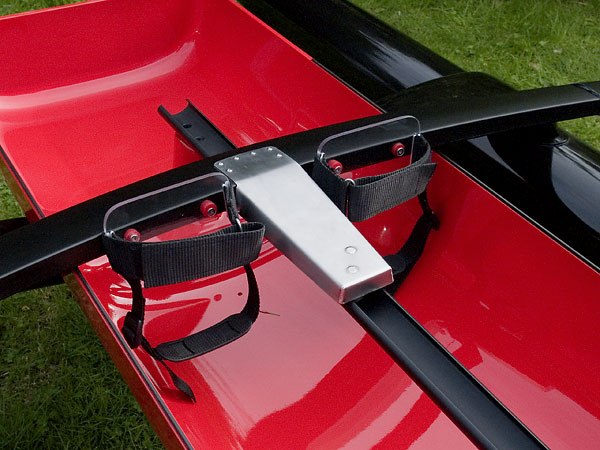
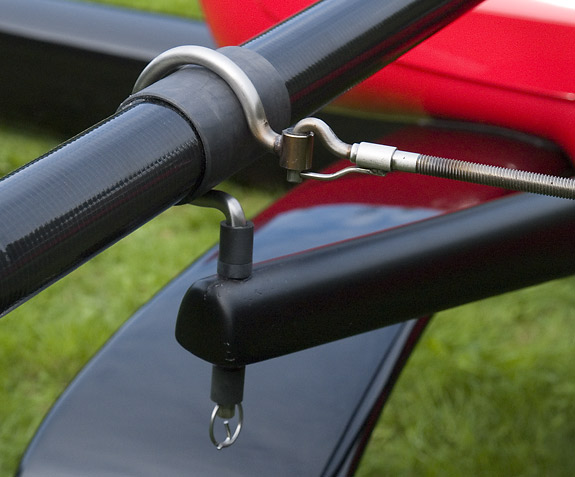
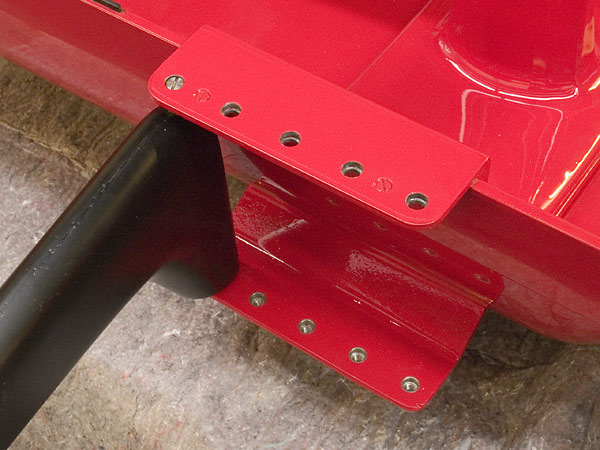
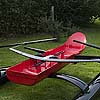
David Gardner collected ROCAT number one yesterday – and it was (almost) finished when he arrived! A combination of low tide and lack of time prevented sea trials, so we assembled the boat in the garden instead.
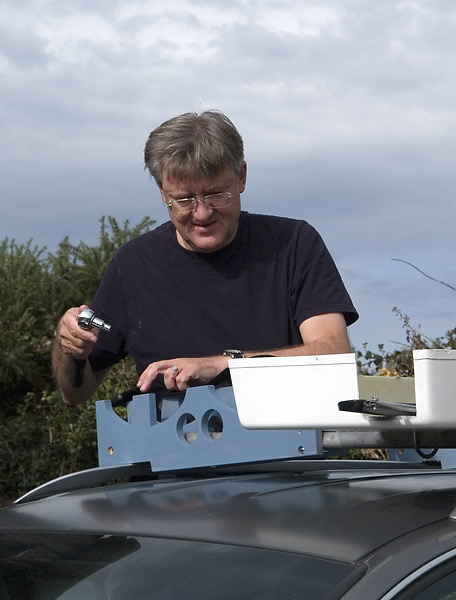
1) when a customer comes to collect his or her boat, it's a bonus if they know how to use a spanner; 2) the footbar and crossbeam fit in the tray, and the inverted seatdeck forms the lid – here Anthony and David are checking everything fits; 3) the seatdeck mounted with the rest beneath; 4) the routing of the straps through the buckle was a bit of a puzzle; 5) Anthony attaches pads to the crossbeams where the seatdeck sits;
6) fitting the seatdeck – the swingarms remain attached to the seatdeck, but one
would normally slide the footbar in after the seatdeck's in place; 7) attaching the Dreher oars; 8 & 9) ROCAT number one duly assembled; 10) the seatdeck showing the ROCAT rigger
 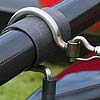 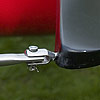  
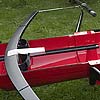
11) the new welded stainless steel 'car' and pedals – the carbon rigger parts are now painted satin black, and look very smart; 12) the ROCAT rowlock/oarlock – the link between the rowlock and the footbar remains attached to the footbar (13) and hooks on to the rowlock thus; 14) the swingarm attaches to the seatdeck thus – its position is adjustable to fit different arm lengths; 15) the underside of the swingarm brackets
16) David tries ROCAT number one for size; 17) Anthony brings one of the hulls down from the field; 18) we check hull fit and alignment – it's important to get the hulls aligned with the car's longitudinal axis; 19) all mounted and ready to go outside Bosulval; 20) ROCAT number one leaving for its new home!
This is a significant milestone in the ROCAT story – while it has taken too long to get here, the arrival is good ... CL
|
|
|
5 September 2006
While production in the workshop is taking precedence, I'm afraid I've neglected the website. The picture is of the first time the yoke installation jig has been used – it did exactly what it's supposed to and rendered the precise location and bonding of the yoke (which supports the swingarm rigger) a doddle. These jigs and things have taken ages to make, but will save an enormous amount of time in the long run.
In the Great Cross Sound/US Open Water Rowing Championships Race, the pair of Tyler Peterson and Evan Jacobs won this 7.6 mile race in a new record time of 49:44 – that is 9.16 mph, an amazing speed over 7.6 miles in conditions described as 'rough, north wind with cross chop' (although, what they describe as rough in Puget Sound would be classed as pretty calm hereabouts!) ... CL
... 1) the yoke installation jig in action
|
|
|
|
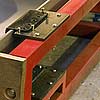
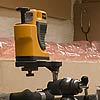
28 August 2006
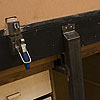
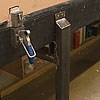
We came to glue the crossbeam sockets into the hulls and realised that the frame we made was just not precise enough, so we have added cradles and supports to get it right every time. Not so long ago, this would have been quite a task, but it was made a great deal easier using a standard, inexpensive, DIY alignment laser. I remember doing a project on lasers at college when everyone agreed they were amazing, but couldn't think what to do with them. I wonder what the people who invented the laser would make of the myriad of diverse uses they are put to today.
We had hoped to have boat #2 shipped to Vancouver in time to take part in the inaugural US National Open Water Rowing Championships on the 26th. Unfortunately, that was not to be, but I have heard from Doug Kidder (owner of sponsors, Maas) that the event was a huge success. What a good idea to attach the Championships to existing open water races, and I can't wait to enter the ROCAT in the next event, which is to be the Blackburn Challenge – a very tough 20 miles race around Gloucester Mass.
We were also hoping to be at the World Coastal Rowing Championships on the Channel Island of Guernsey, but are frantically working to get these first three boats out. I think it will be very interesting to see how things pan out on the 'open water' or 'coastal' scene over the next few years, and these 2 events probably personify the 2 very different approaches – the all-inclusive approach as typified by the Sound Rowers in Puget Sound, and the heavily restrictive approach seen in the FISA regulated races. Which will attract more people to this rapidly growing sport? ... CL
... 1) aligning the socket bonding jig
|
|
|
|
21 August 2006
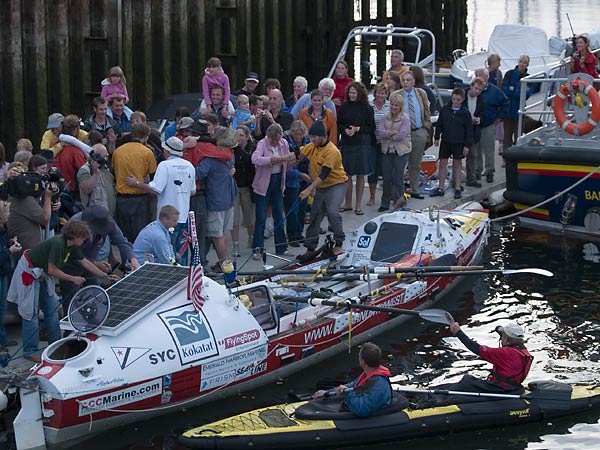
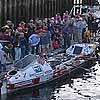
Hearty congratulations to the OarNorthwest crew of four from Seattle – they arrived in Falmouth yesterday evening having rowed across the Atlantic from the Liberty Landing Marina in Jersey City, NJ. Rowing the Atlantic seems a pretty common occurrence nowadays, but I was surprised to hear that these guys are the first to row from mainland USA to mainland England. There are two more (British) crews still out there aiming for the finish line south of the Bishop Rock Lighthouse off the Isles of Scilly – I wish them fair winds and helpful currents ... CL
... 1) Jordan, Brad, Dylan, and Greg (not in that order); 2) much relieved families greet them as they step ashore; 3) the National Maritime Museum, Falmouth is the backdrop
|

|
|
|
9 August 2006
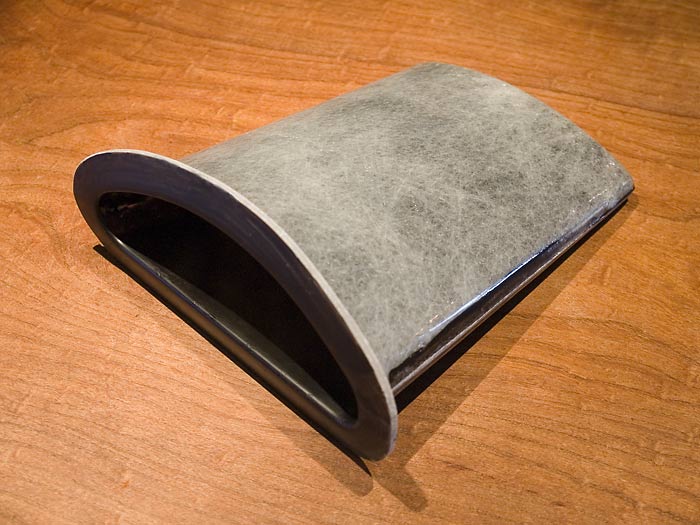
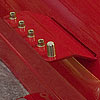
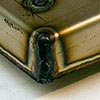
Did ever a small, simple composite component give so much satisfaction – we appear, at last, to have cracked the persistent hull crossbeam socket problems, and have pulled a good part! It is ironic that the hair-tearing hunt for a solution has, once again, turned up a better way of doing it – 'displacement resin infusion' (described 31 July below) is magic in its simplicity and effectiveness. All we have to do now to break this particular log-jam, is make 11 more sockets in double quick time – then we can install them and begin painting ... CL
... 1) the socket!
|
|
|
|
8 August 2006
Bit by bit we are getting the manufacturing infrastructure in place – although it seems to take forever at this stage, each bit will reduce the time it takes to make a boat. One day, the ROCAT will be produced by the hundred in a pristine factory somewhere, but so far it is still very much 'handmade' and labour intensive.
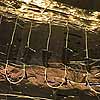
The heating for the hull mould is now installed and fully insulated. It took some time to fathom the English translation of the Italian controller's 'handbook' but, much to our relief, it does all appear to work!
Anthony has made a jig to enable the seatdeck to be spray-painted in one go.
Further to the socket saga, the infusion went very well but then, when it came to demoulding, we found we had a magnificent 'stickup'! Moulding composite parts is strange – the epoxy resin we use is extremely adhesive, but we suck it into our moulds and hope and pray that the release system will prevent it from sticking to the mould surface. Every so often, though, something goes wrong and it does stick, which is a pain and a waste of time. A stickup in one of the big moulds is the stuff of nightmares ...
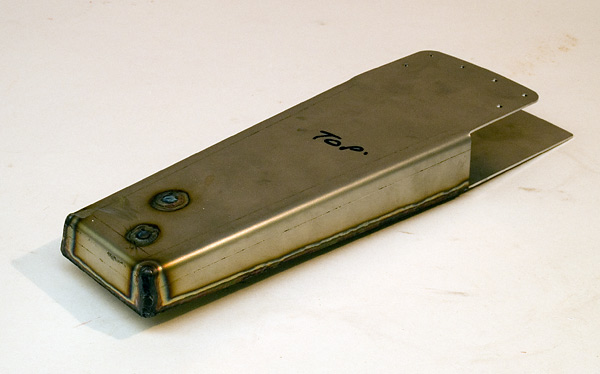
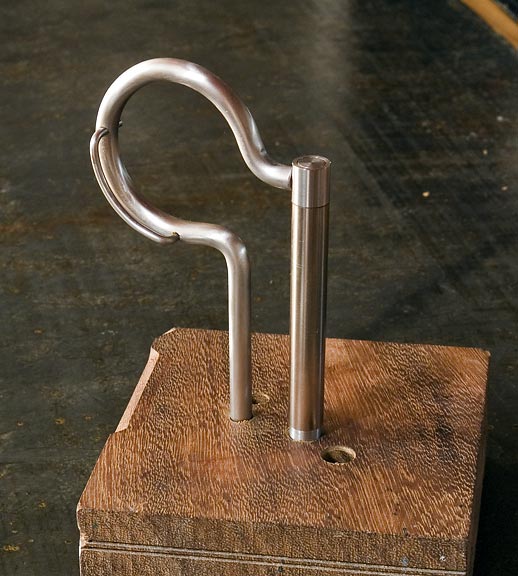
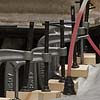
We call the bit of the footbar that rolls up and down the track the 'car'. The original carbon fibre version proved too flexible, so we made one of cast resin and sheet stainless. But this was too heavy and time-consuming to make, so we are now having a shape laser-cut out of stainless sheet, and welded into a box form – I have just picked up the prototype which looks good, and is extremely stiff ... CL
... 1) the hull mould heating and insulation complete; 2) the spit-style jig to support the seatdeck while it's being painted; 3 & 4) the socket stickup and repaired moulds; 5) the new welded stainless steel car
|
|
|
|
2 August 2006
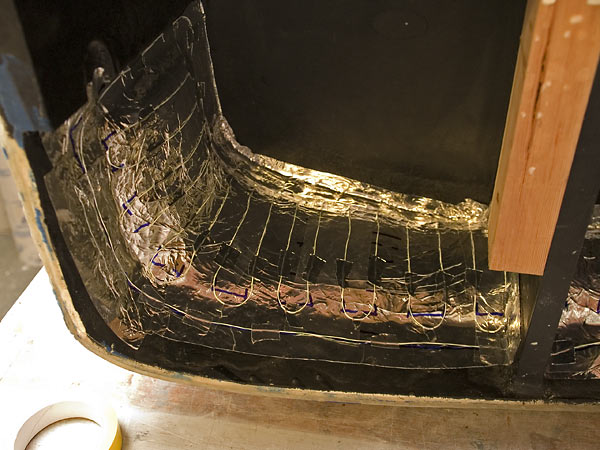
Rowland Spencer from Hotbox International came down yesterday, and we helped him install mould heating on the hull, crossbeams and seatdeck moulds. Searching for 'electric mould heating' on the internet, I was a little surprised when Google pointed me to Hotbox International which specialise in horticultural equipment. It turns out that, with a nifty bit lateral thinking, they have applied their years of experience in the programmed heating of seed beds etc. to heating moulds.
Now, with the elements and controllers in place, we just need to apply plenty of insulation before we can 'post-cure' the freshly moulded parts in the moulds. Post-curing is achieved by gradually raising the temperature of a composite part to about 10°C less than you want it to withstand, and then letting it slowly cool down – it is done to increase the epoxy resin's mechanical properties and raise its temperature tolerance (up to about 90°C in our case!).
I have decided to pull the forum for the time being – it seems that, although this site gets a remarkable amount of traffic, few visitors want to participate in discussions yet. I'll try again when there are more boats out there ... CL
... 1) Rowland Spencer from Hotbox International applying heating elements to the underside of the hull mould; 2) elements on the underside of the crossbeam mould; 3) the seatdeck mould with elements and controller awaiting insulation
|

|
|
|
31 July 2006
This new product development business is so full of ups and downs!
We wonder, for example, how it is possible for such a simple moulding shape as the socket (that bonds in to the hull to accept the crossbeams) to give us so much grief – Anthony has now produced a completely new mould and, for reasons we fail to understand, the first part produced in it would NOT demould?! – so we have now split the female mould into two, which should solve the demoulding problem once and for all ...
Then we get little breakthroughs which can feel really good ...
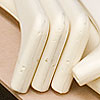
While we enjoy the fact that the polyurethane foam we use inside the carbon parts enables us to produce those parts relatively easily, it has irked us that the foam performs no structural part to justify its considerable weight. It's also becoming apparent that it is far from stable, even when encapsulated in epoxy resin and carbon fibre. The only alternative seemed to be epoxy foam but, as mentioned before, this is far too heavy and very expensive. Unless, of course, you mix it with those little polystyrene beads you get in bean bags! We have to do more experiments before we get the right ratio of beads to epoxy foam, but it is less than half the weight the plain epoxy foam, and substantially stronger than its polyurethane counterpart – it is clear from the first trial that we are on to the solution we have been hunting.
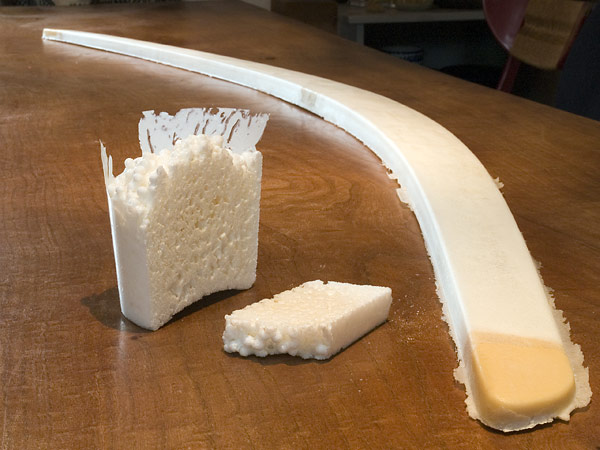
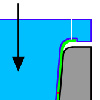
And in moulding the socket, we chanced upon a delightfully simple method of combining the resin and the glass reinforcement – as I can't find it referred to elsewhere, I have called it 'displacement resin infusion'! The accompanying schematic shows how it works ... CL
... 1) the first sample of polystyrene bead filled epoxy foam. We had already successfully made a couple of plain epoxy foam footbars; 2) a schematic of 'displacement resin infusion'
|

|
|
|
25 July 2006
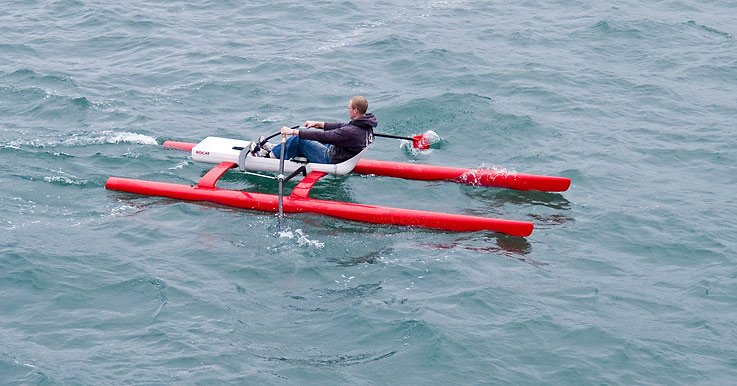
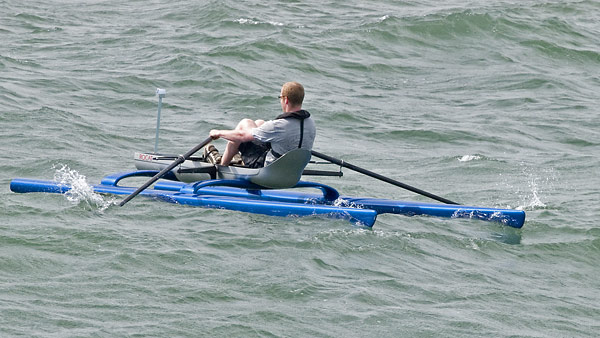
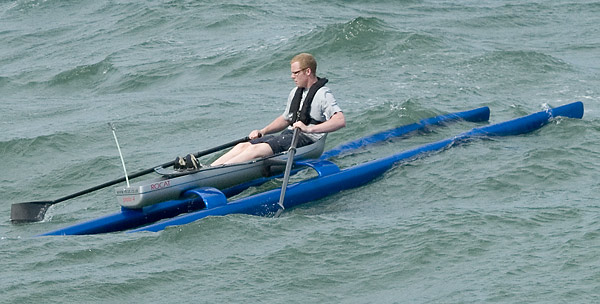
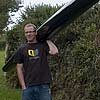
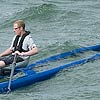
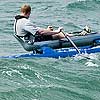
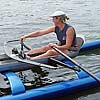
Simon Parker came down to see us last week. He is the editor of 'Living Cornwall' in the Western Morning News (a daily paper covering England's South West region) and he is going to write a feature on the ROCAT on 8th August. Digging out suitable pictures, I came across the one of Anthony going well at sea in proto 3 – while the rough sea pictures show what the ROCAT is capable of, I think this image sums up what the ROCAT is about.
proto 4 is out of action while we make a few modifications and repaint it to test a different, supposedly tougher, clear lacquer. This gives us the opportunity to try out a new colour scheme – you would have thought that, with a completely free choice of colour (and to some extent finish), choosing would be easy, but we've found it surprisingly difficult. This time we have gone for a decidedly less 'safe' scheme – I look forward to seeing what it looks like!
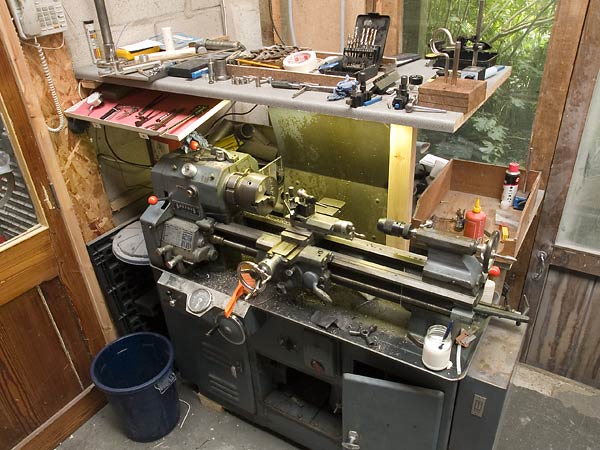
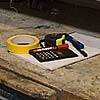
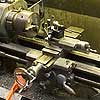
We eventually got my old Boxford metal lathe up and running – this is truly one of those machines that I wonder how we ever managed without it. Apart from the numerous components we will be machining on it, we have been able to turn up all sorts of useful fittings and bits – one such is the jig (which looks more like a trophy) which I've produced to help Fabweld's Jeremy Wicks weld the eye on to the rowlock.
huh! ... 'the best laid plans of mice and men ... etc. etc.' We have an ingenious way of removing the bag from the hull once it has performed its moulding function – as we make up the bag, we run a strong tape down the inside, and fix it to each end. Then, when we cut the holes for the sockets, we reach in and pull on the tape to peel the bag back from the ends. The trouble is, since we upgraded the bag material, and began to use Sicomin 1710 epoxy resin (which is even stronger than the 8100 we were using), the bag is not so keen to come out, and the tapes have come detached – annoying!
We have been developing a technique we call 'heading' – it could be widely used, but we've not seen it reported elsewhere. After we have used the vacuum to draw the resin through the dry glass, or carbon fabric, we disconnect the vacuum and clamp the pipes upright. We then use a syringe to top up the pipes with resin until a comfortable equilibrium is reached in the mould cavity vis-a-vis the atmosphere – the system works well for us ... CL
... 1) Anthony rowing proto 3 on a slightly lumpy sea; 2) the Boxford metal lathe; 3) the welding jig to attach the 'eye' to the front of the rowlock; 4) the crossbeam mould being headed.
|

|
|
|
1 July 2006
For a long time I have wished that the interesting topics raised in emails to ROCAT could be shared with a wider audience, and that visitors to the website could join in the discussions – well I've finally got around to installing a forum, so I hope lots of people will drop in and ask questions or contribute their two pennyworth. It's very basic so far but gradually, as I get the hang of the program, and traffic begins to increase, it will become a place worth visiting.
ROCAT owners-to-be, and regular visitors, could hardly have failed to notice that production has been much slower than we had hoped –
I thought I would touch on some of the reasons for this.
The transition between development and production has been far harder than we realised. The boat has always been designed for production, but there are so many parts, it doesn't take much of a problem with one part to set the production back by days. The voids in the carbon parts are a good example. The crossbeams, yoke, swingarms and footbar are all made in the same way – we cast a polyurethane foam blank which we then wrap in carbon fibre and put in a closed mould, where a vacuum is used to 'infuse' the carbon fibres with epoxy resin. In principle, and sometimes in practice, this is an excellent way to make carbon fibre parts, but we have been getting tiny voids on the surface which we can't explain or seem to cure. All the carbon is fully impregnated with resin, so the strength of the part is not an issue, but we simply cannot send out naked carbon parts with surface voids. As we are painting the crossbeams and yoke, the pits on these can be filled, but that is very time-consuming.
By a process of elimination, we believe that the problem could be caused by the foam blanks – that gas could be escaping from the supposedly 'closed-cell' foam structure under vacuum. The trouble is, although we have managed to produce pretty smart polyurethane blanks, we are well aware of the material's limitations – we're using it as disposable tooling in the moulding process but, unfortunately, it contributes nothing to the part's strength thereafter and is just so much dead weight. Would that there were a solvent we could use to dissolve it out. Or that there was a more satisfactory foam we could use that would become a useful part of the structure. We have tried some test samples of epoxy foam – this is remarkably strong, but it is about 3 times the weight, 10 times the price, and much more tricky to produce.
Then there has been the need to make numerous jigs to enable us repeatedly to hold parts in exactly the right place while they are glued or drilled – these have taken a lot of time over the last months in order to save time in the future.
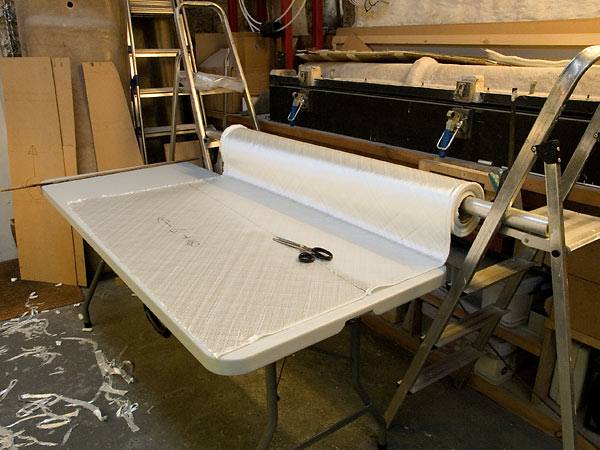
And the long-winded process of cutting out the layers of glass fabric for the hulls – hopefully, Cristex will be able to supply the glass in kits of CNC cut parts, which will save a lot of time.
We are getting there, but it's very frustrating that it's taking so long, and we aplogise to those who are patiently waiting ... CL
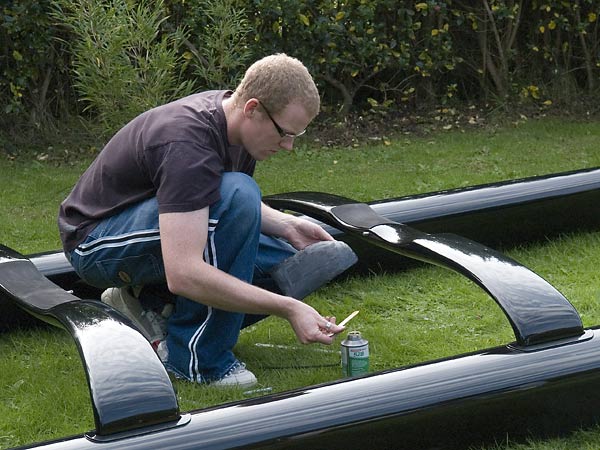
... foam blanks; 3 boat's worth of crossbeams, filled and primed; cutting the glass cloth – with the Soric, there are 24 pieces per hull
|
|
|
|
17 June 2006
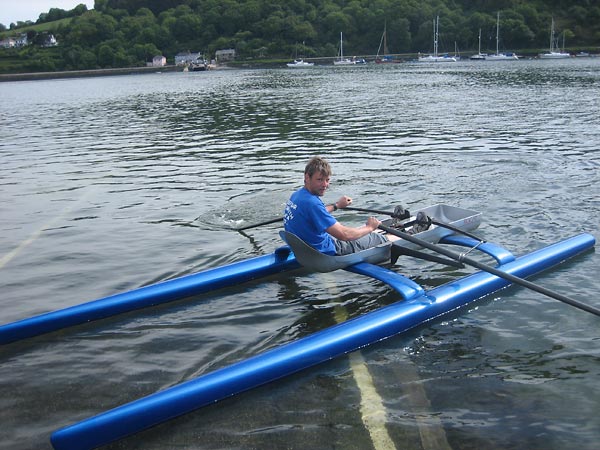
Since getting the feedback from the Dartmouth rowers, we have been trying out some of their tuning suggestions. Several people have suggested that, based on their sculling experience, the oar handles should be closer together, so we tried increasing the oar's inboard by 50mm (which is much less than suggested) – this resulted in both Anthony and me getting our legs thoroughly tangled in the oar handles – it just does not work! The ROCAT stroke needs the hands to be outside the knees. I didn't log every step of the development process, but the present handle position was arrived at by trial and error. However, we will try it again with less adjustment.
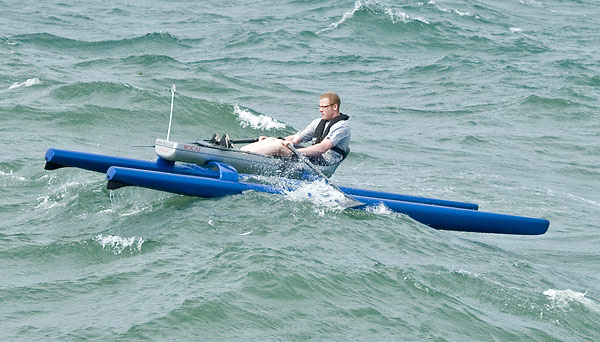
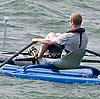
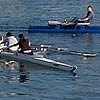
We have made up a pair of the new (stronger) Dreher oars with an adjustable outboard – they can be either 50 or 100mm shorter than the previous oars; we have also raised the rowlocks by 30mm. On the roughish sea pictured on the right, Anthony preferred the higher rowlocks and the oars at their shortest setting.
It was blowing less hard when I went out the following day, but there was still a good sea running and I also liked the raised rowlocks and shorter outboard. On the following day, I went out on a flattish sea with the same settings and it felt wrong – the oar handles were too high, and the stroke too low geared for cruising. We are working out how to make the rowlocks height adjustable to suit different sea states – not something a regular sculling boat has to contend with!
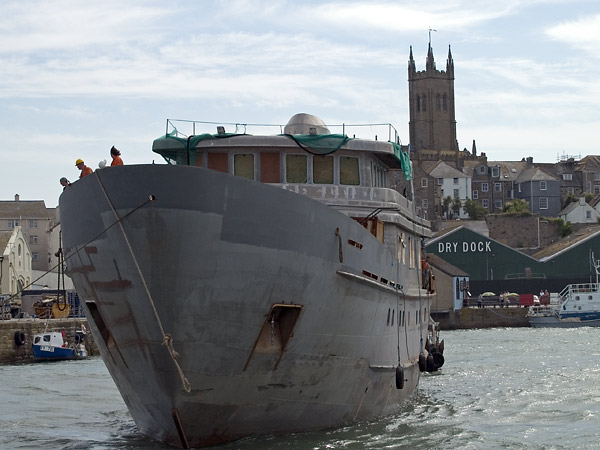
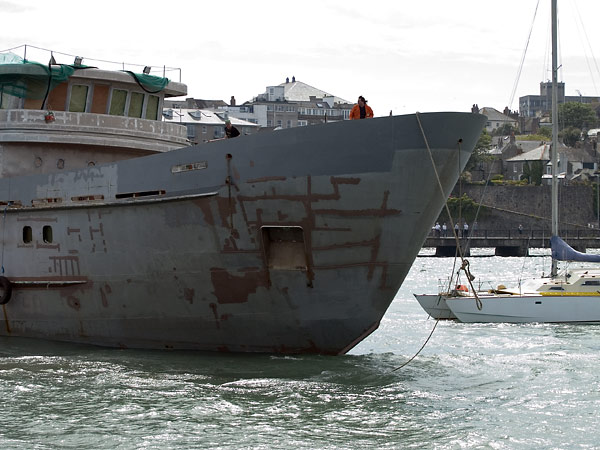
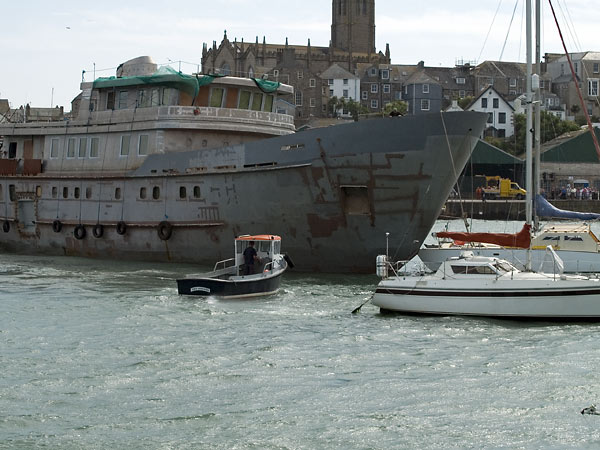
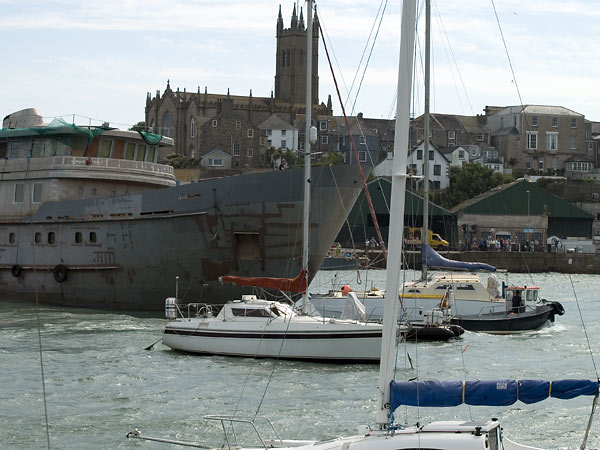
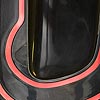
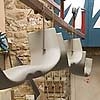
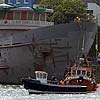
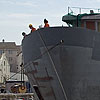
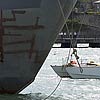
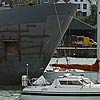
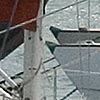
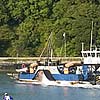
While we were shooting these pictures, we noticed that the local shipyard was moving the 'superyacht' they're building around from the dry dock to the wet dock. It was blowing top end of 5 into the harbour and, given the lightness of the vessel and it's great windage, this had the makings of a tricky manoeuvre. We presumed they would have plenty of boats in support but, in fact, they only had two small tugs, and a little fella.
It appeared to start OK, but then the line to the bow tug came adrift, or was let go(!), and a disaster seemed inevitable as the bow began to swing rapidly towards a harbour-full of moored sailing boats. As the picture sequence shows, with the stern tug pulling flat out, an almighty collision was averted BY MILLIMETRES!
Back to the ROCAT, the next hull we made was fine and we now have three gooduns ... CL
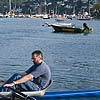
... Anthony takes proto 4 out on a roughish sea; and a sequence showing a close call!
|

|
|
|
8 June 2006
That'll teach us! We've now made the seatdecks and crossbeams and footbars and swingarms for the first three boats, and were all set for the trouble-free production of six hulls. We like the hull mould for, although it is the most innovative technologically – it would appear that nobody else is making hulls like these in one piece – it has consistently produced very good parts right from the start. But it's ages since we made proto 3's hulls and we had to think quite hard as we laid up the glass and made the internal bag. However, we were quite confident when we began the resin infusion, and seriously concerned when the resin showed at the bow with a lot of air – somehow the bag was leaking and the part was scrap – ******* (expletive deleted)!
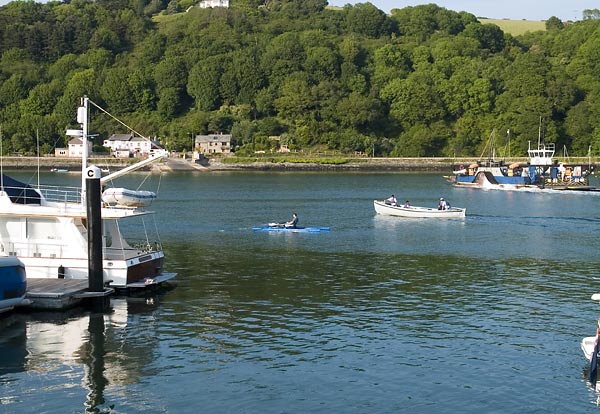
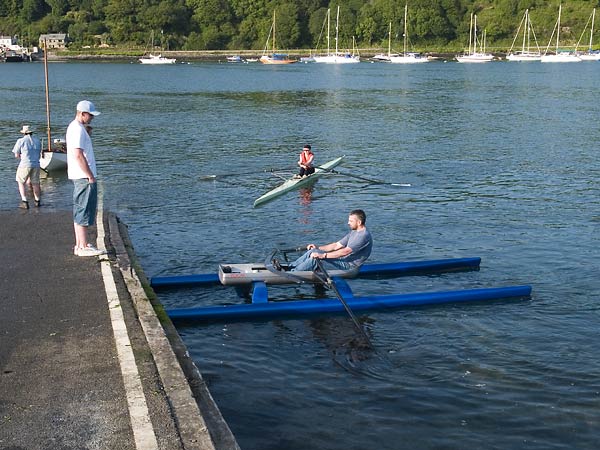
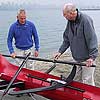
Anthony and I went up to Dartmouth in Devon yesterday to collect proto 4, and to talk to Richard and others who has been trying the boat over the last ten days.
The mouth of the river Dart provides one of the few sheltered anchorages along that coast and Dartmouth, consequently, has a long seafaring history. It also has one of the most active rowing communities in the south west, with rowers of all persuasions often to be seen out on the river.
Richard competed in Cornish gigs for many years, and has also rowed in fixed-seat skiffs and sliding-seat sculls. He liked the boat very much and, fortunately, the changes that he would make relating to rowlock height and inboard length were either already planned, or easy to try.
Most of the discussion with others who tried the boat centred on the stroke. The sculling stroke has been around for over a hundred years and, although it is somewhat subject to fashion, ought to be as good as it can get by now; but the ROCAT stroke is new and different. I believe, for example, that you should not lean forward for the catch in the ROCAT but, according to scullers, that is a vital part of the rowing stroke and you should definitely do so. The drawing in the last post shows that, without leaning forward, the ROCAT stroke is pretty well the same length as a sculling stroke, so leaning forward merely takes the blade into to a zone of very little forward thrust. But, much more important, as the back is no longer supported when you lean forward, you simply can not push so hard!
However, we at ROCAT must be as open-minded about these things as we'd like existing rowers to be, and who's to say what is right or wrong at this very early stage – I'm just going on what worked best for me as I developed the boat. When people start racing the ROCAT, it may well be found that leaning forward does give you a bit of extra pace, and pet theories will abound for sure! ... CL
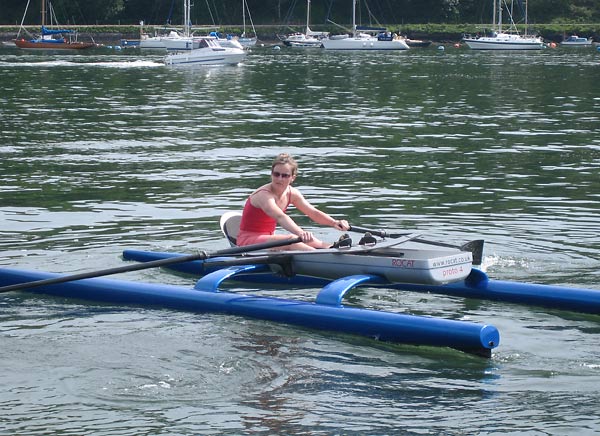
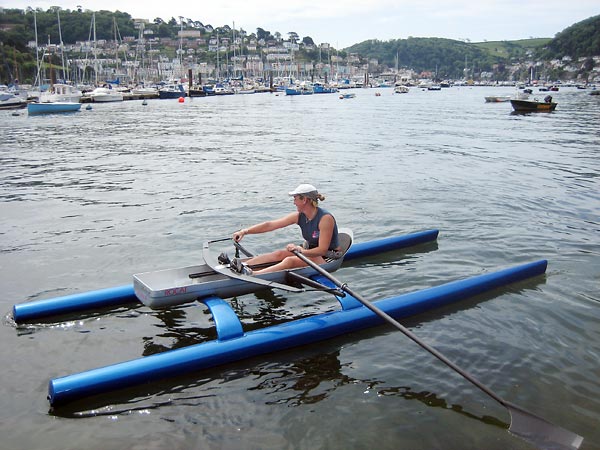
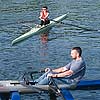
... 1) the ROCAT on the river Dart; 2) rowers coming into the ferry slip to disembark; 3 & 4) Richard dissecting the stroke and making suggestions; 5) Yorkie Lomas who captained the first 4-man crew to row the Atlantic – their time 36 days 59 minutes remains a record; 6) Amanda Inkster, who is an ARA coach and successful single sculler; 7) Alison White, who is an experienced fixed-seat and sliding-seat rower.
|


|
|
top
|